** Please excuse the horrible styling while I work on my markdown to html... **
In this tutorial, we will walk through the process of building a LiveKit Agent that automatically answers phone calls coming from Twilio SIP and processes them using AI. By the end of this guide, you’ll have a working system where:
- A phone call made to a Twilio number is routed through a SIP Trunk to LiveKit.
- A LiveKit Agent automatically joins the call and can respond to it.
- Optional: The agent can be enhanced with AI for transcriptions, auto-responses, or real-time processing.
This tutorial is designed for developers familiar with web technologies but does not require prior experience with SIP or LiveKit Agents.
Reference Section: LiveKit, OpenAI, and Twilio
Throughout this tutorial, you will create accounts and configure on LiveKit, Twilio, and OpenAI. Here is an overview of all the information you will need to have handy. (Don’t worry though, we will walk through all of this. This section is just a quick reference to make sure you have everything).
LiveKit
LiveKit is an open-source, real-time communication platform that enables developers to build scalable, low-latency audio/video applications using WebRTC. It provides APIs and SDKs for managing rooms, handling media streams, and integrating AI-driven agents, making it ideal for building live streaming, conferencing, and telephony solutions.
You will need:
- LiveKit Cloud account
- LiveKit Project
- LiveKit API Key
- LiveKit API Secret
- LiveKit Project URL
- LiveKit SIP URI
- LiveKit CLI
OpenAI
OpenAI, when used with LiveKit Agents, provides AI-driven capabilities such as speech-to-text, text-to-speech, and conversational AI via API integration. By supplying an API key, developers can enable LiveKit Agents to process and respond to calls using OpenAI’s models, allowing for automated transcription, intelligent responses, and real-time interaction enhancements.
- OpenAI Platform account
Twilio
Twilio is a cloud communications platform that provides APIs for voice, messaging, and video applications, enabling developers to integrate telephony into their projects. When used with LiveKit, Twilio’s SIP Trunking and Programmable Voice API allow phone calls from traditional networks (PSTN) to be routed into LiveKit rooms, enabling real-time WebRTC-based communication with AI-powered agents or other participants.
Twilio account
- Phone Number
- Twilio Account SID
- Twilio Auth Token
- TwiML Bin
Setup LiveKit Cloud
LiveKit Cloud is where you can create and find your API key and secret, as well as monitor sessions, rooms, and calls.
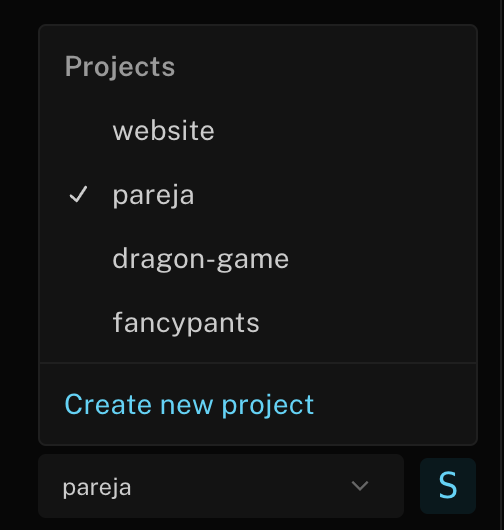
-
Go to cloud.livekit.io and make sure you have chosen the correct project from the bottom left menu.
- I would recommend you create a new project for this tutorial.
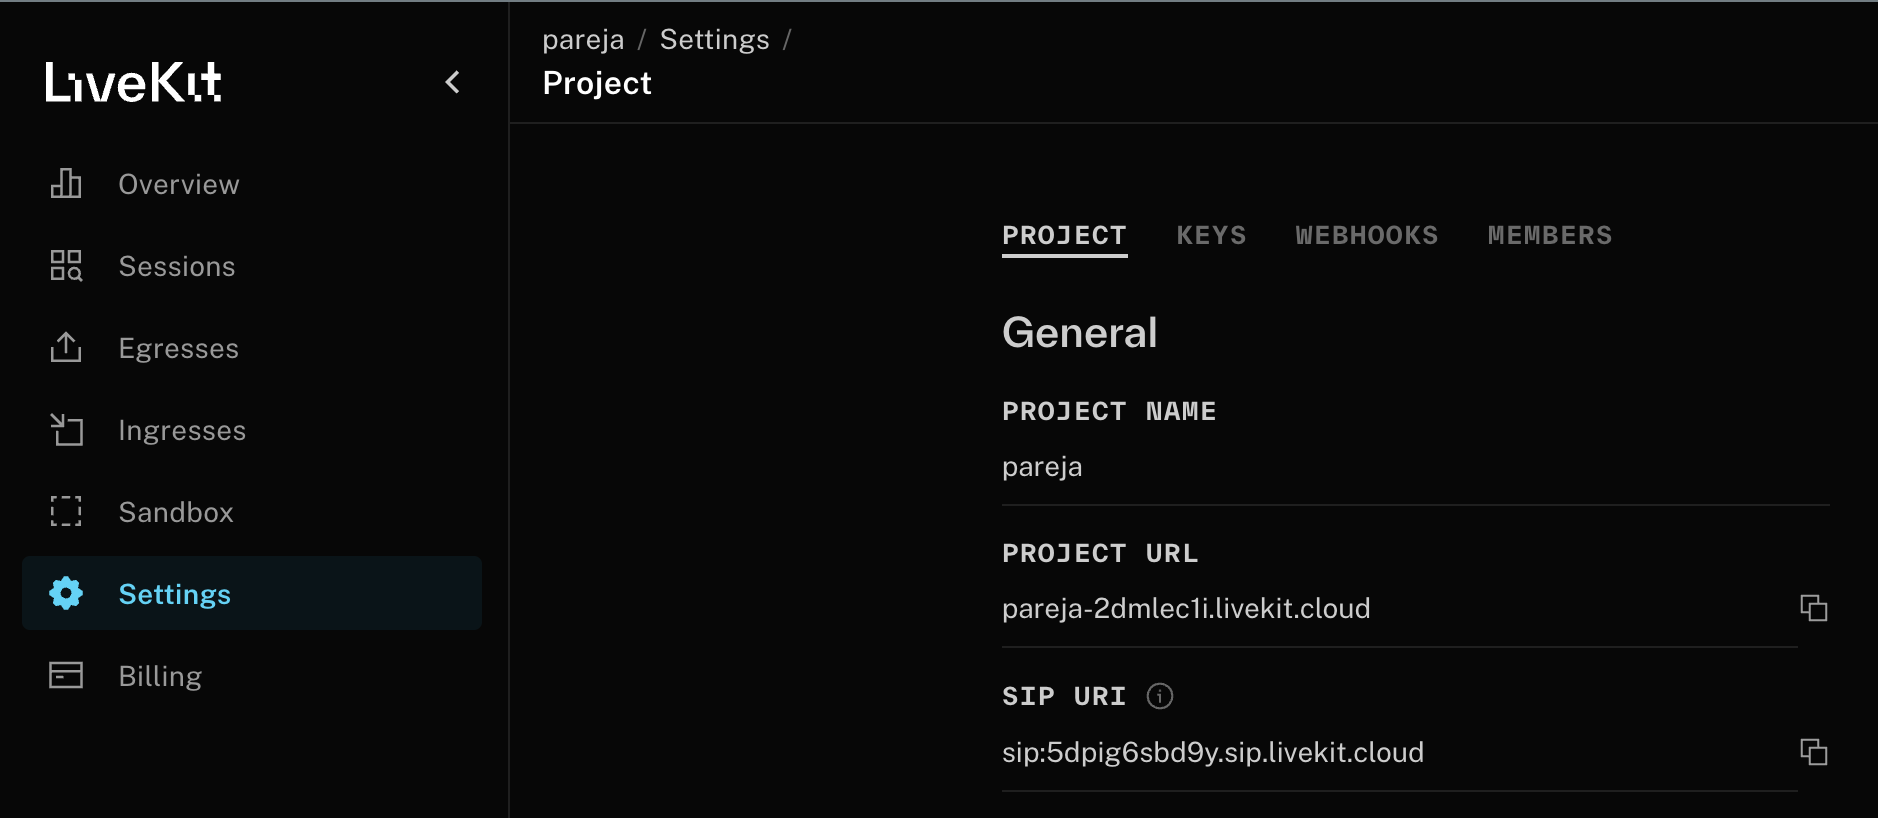
-
Go to Settings and save the LiveKit Project URL and LiveKit SIP URI
- LiveKit Project URL:
- LiveKit SIP URI:
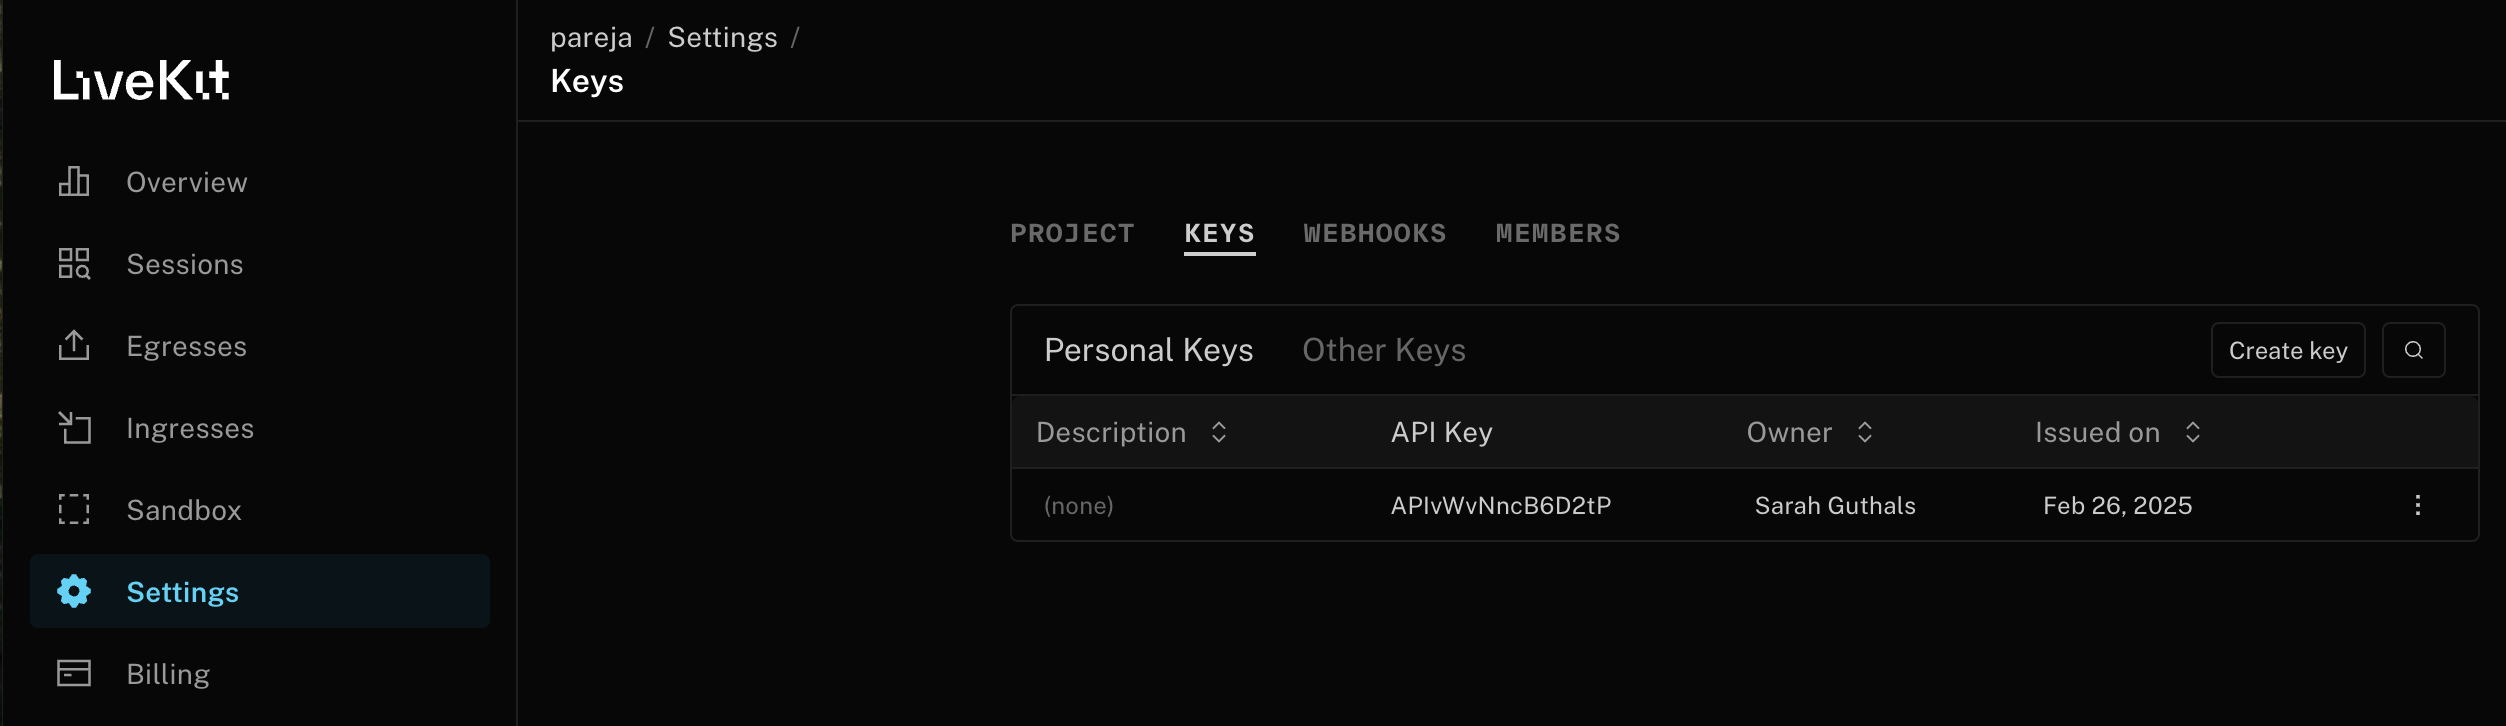
-
Click on the Keys tab in the settings to create and get the LiveKit API Key and LiveKit API Secret
- LiveKit API Key
- LiveKit API Secret
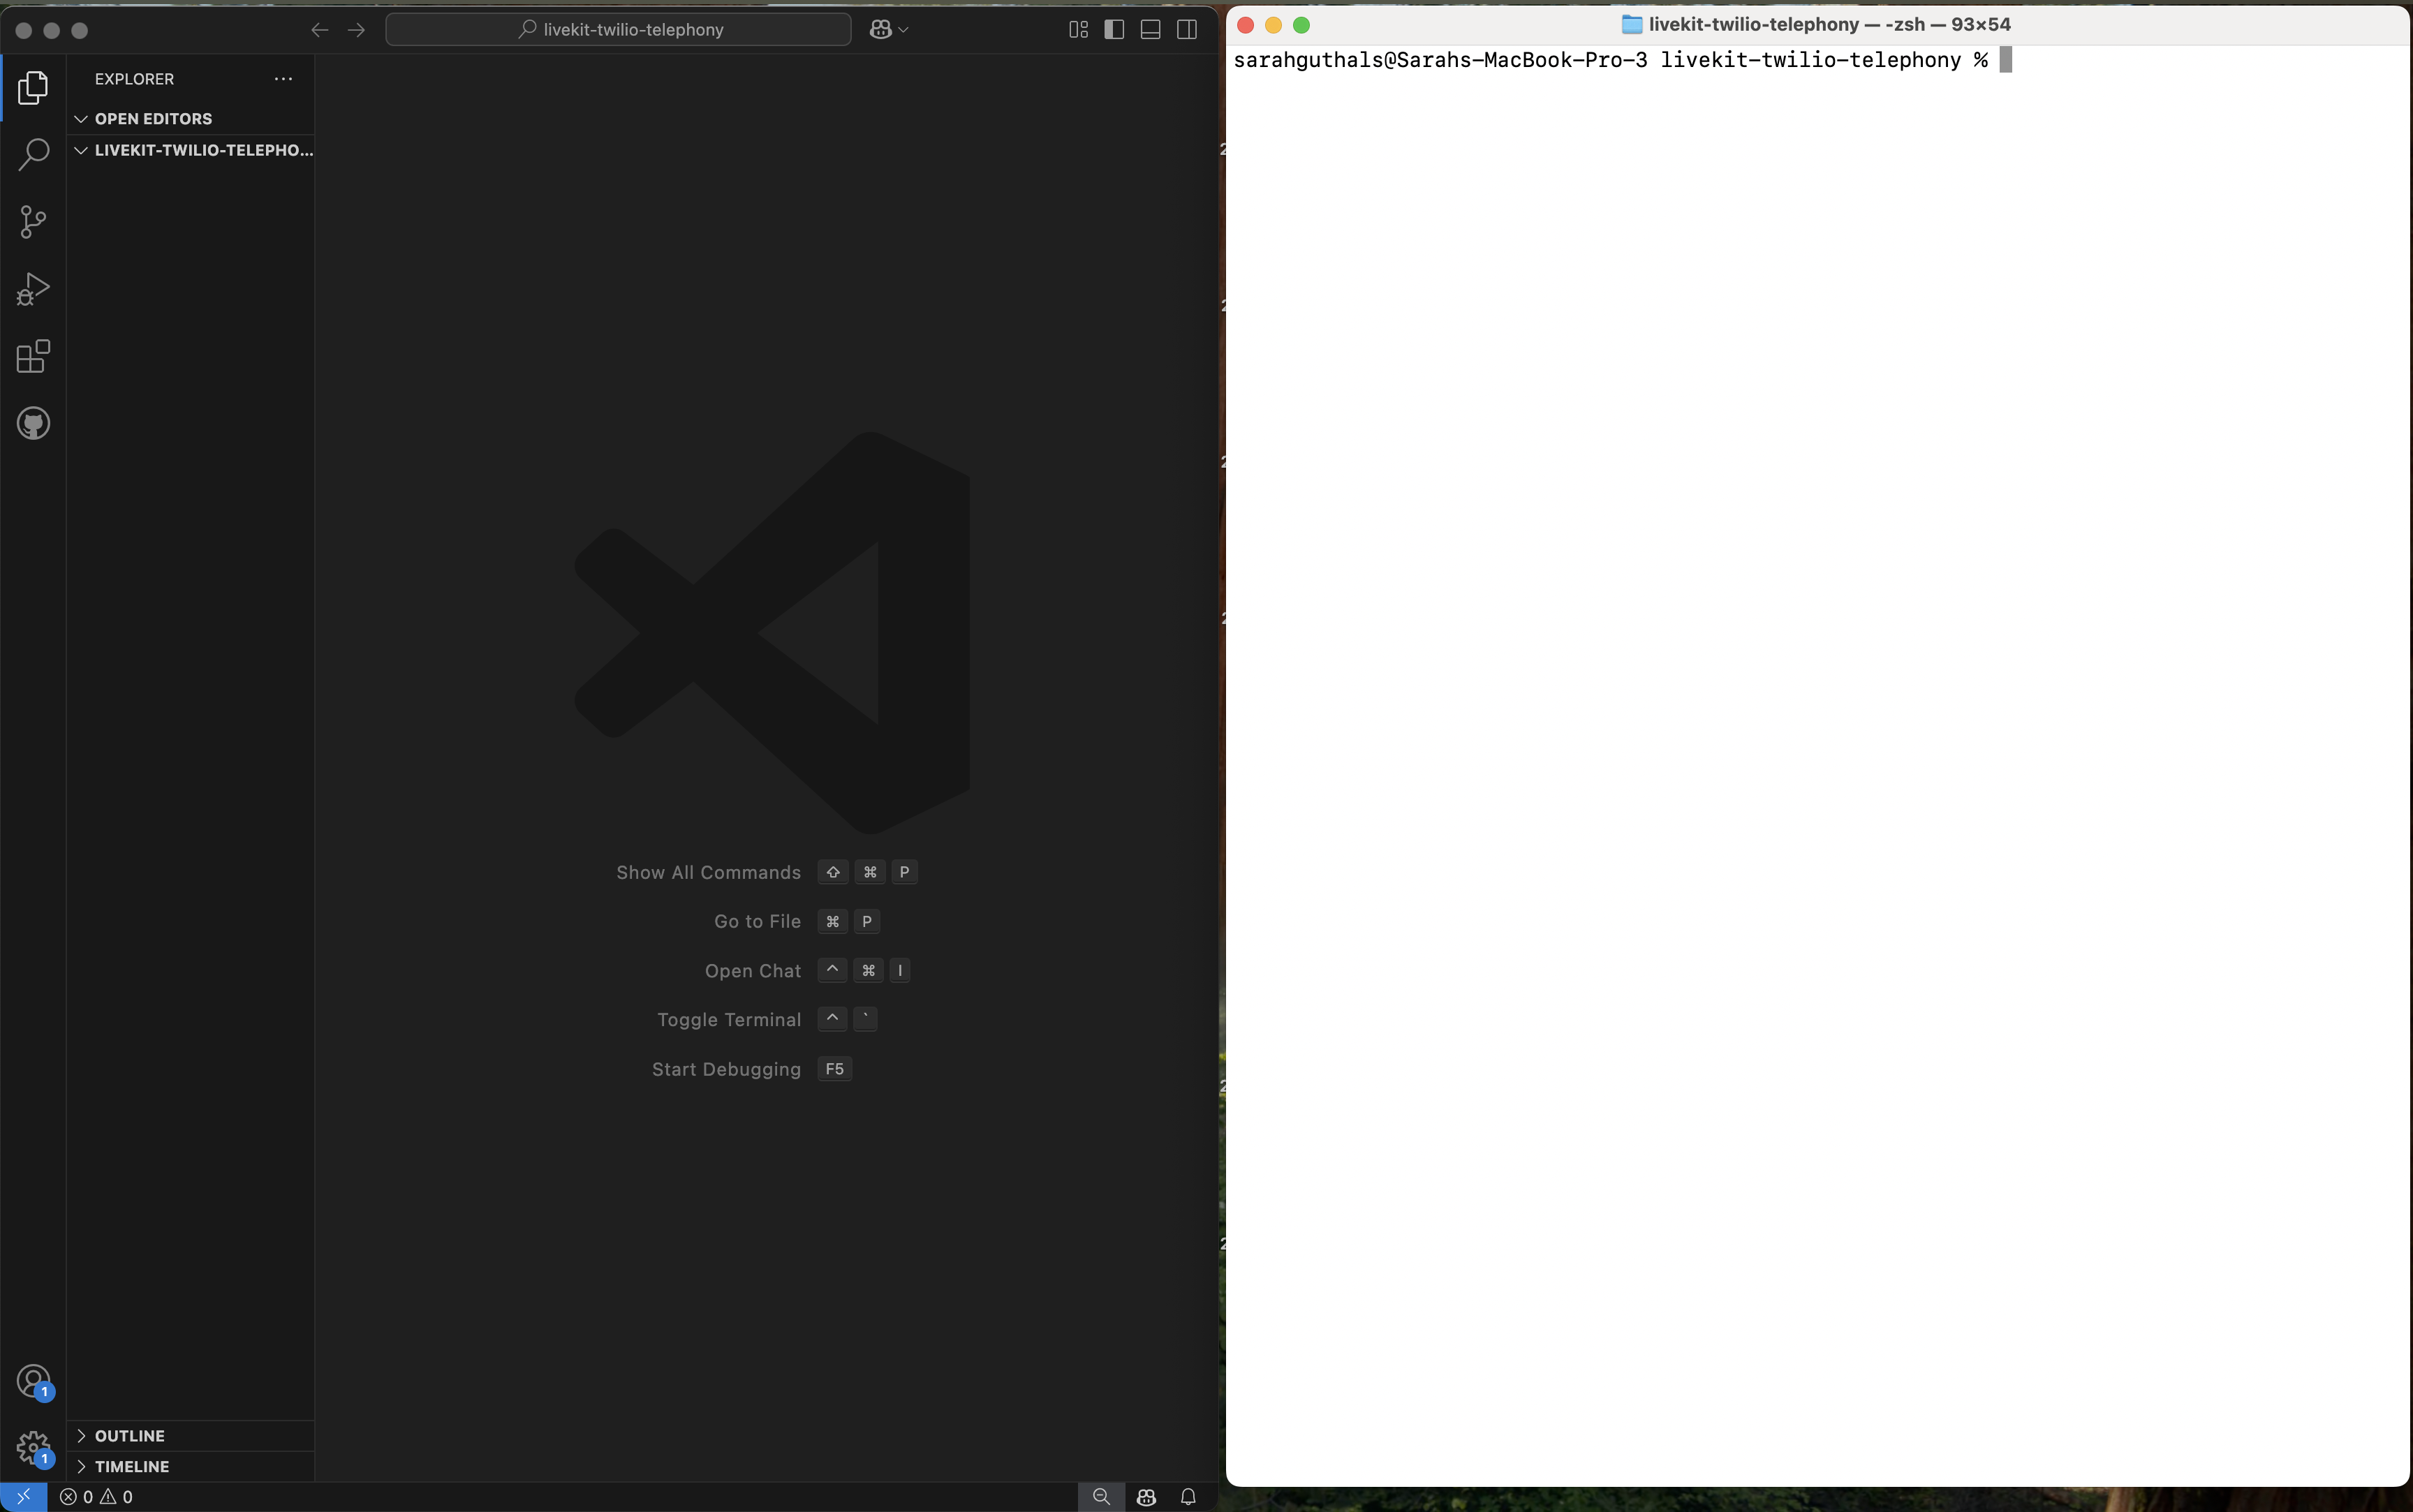
LiveKit CLI and Local Environment Setup
LiveKit offers a CLI for quick references and actions. For this tutorial, we will be using the default Mac terminal for all terminal operations and VS Code for code editing.
Setup Twilio
Twilio enables you to purchase phone numbers and connect those numbers to other applications for automation. In the context of a Telephony application with LiveKit, it is often referred to as a SIP Trunk Provider.
-
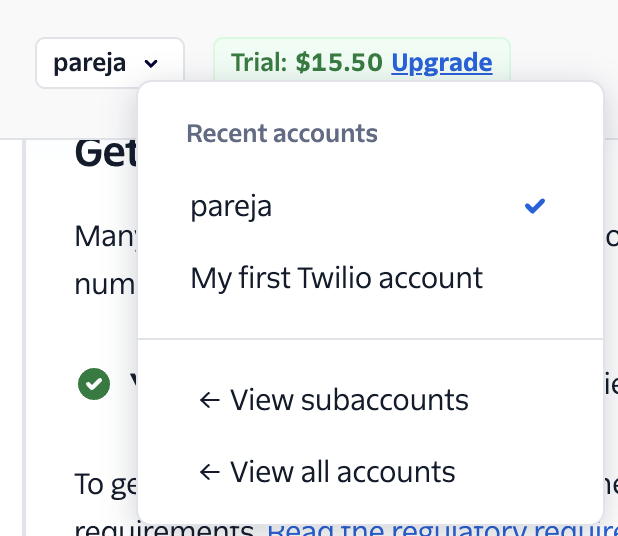
Go to https://console.twilio.com/ and make sure you have chosen the correct project from the top middle menu.
- I would recommend you create a new project for this tutorial.
-
Purchase a phone number through Twilio, if you haven’t already.
-
On the home console page (https://console.twilio.com/), locate the following information:
- Phone Number:
- Twilio Account SID:
- Twilio Auth Token:
Create and configure your Twilio TwiML Bin
TwiML Bins are lightweight serverless endpoints provided by Twilio that allow developers to handle incoming calls and messages using TwiML (Twilio Markup Language) scripts, without needing a backend server. They are useful for quickly routing calls, forwarding messages, or triggering actions, such as directing a SIP call to LiveKit for real-time processing.
-
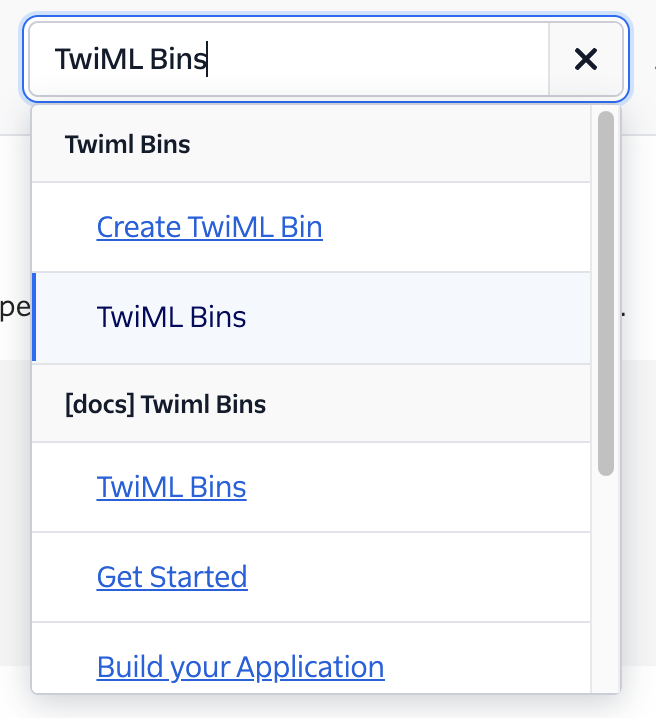
Go to My TwiML bins
- If you cannot find them, try this deep link or try searching in the Twilio search bar for “TwiML Bins”
-
Click on Create new TwiML Bin
-
Give it a name
-
Paste the following XML code into the bin, making sure you update with your SIP URI, phone number, and whatever username and password you want.
<?xml version="1.0" encoding="UTF-8"?> <Response> <Dial> <Sip username="<username>" password="<password<"> sip:<your phone number starting with +>@<your SIP URI custom id>.sip.livekit.cloud </Sip> </Dial> </Response> -
Make sure the bin is valid, a small green check mark with the words “Valid Voice TwiML” should be just below the configuration text box.
-
-
Click save
Attach your TwiML Bin to your Twilio-purchased phone number
You need to let Twilio know that whenever someone calls the phone number you purchased through Twilio, that the TwiML Bin should be run, since this is what is connected to the LiveKit Inbound Trunk, which you will create next. To do this, follow these steps:
-
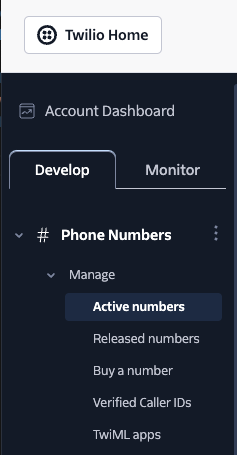
Go to your Active numbers on Twilio
-
Click on the phone number you purchased
-
Click on the Configure tab and go to the Voice Configuration setting
-
Confirm the following settings:
- Routing: Your local country is Active
- Configure with: Webhook, TwiML Bin, Function, Studio Flow, Proxy Service
- A call comes in: Twiml Bin
- TwiML Bin: The bin you created in the previous step
-
The rest of the settings can be left as is for now.
- You might consider setting up the Emergency Calling and upgrading your project from a trial to remove default messaging*
-
Scroll to the bottom and click Save configuration
-
When you go back to your Active Numbers, you should see the TwiML Bin connected to your phone number
Debugging the Twilio
One small tip for debugging if the issue is coming from your Twilio configuration or your LiveKit code or configurations is to add a <Say> message before and after the attempt to connect via the SIP trunk to LiveKit. For example, you might consider modifying your TwiML Bin to the following:
<?xml version="1.0" encoding="UTF-8"?>
<Response>
  <Say> Hello, connecting you to an agent now. </Say>
  <Dial>
    <Sip username="<username>" password="<password<">
      sip:<your phone number starting with +>@<your SIP URI custom id>.sip.livekit.cloud
    </Sip>
  </Dial>
  <Say> You have been disconnected from the agent. You may hang up now. </Say>
</Response>
Just don’t forget to save your TwiML Bin if you make changes to it.
Assign your TwiML Bin to your Twilio phone number
Now you have to configure the phone number you purchased to execute the code in your TwiML Bin when the number is called.
- Go to Phone Numbers → Manage → Active numbers
- Go to the Configure tab
- Fill in the following information in the Voice Configuration section:
- Configure with: Webhook, TwiML Bin, Studio Flow, Proxy Service
- A call comes in: TwiML bin
- TwiML Bin: The one you created above
- You can leave the rest of the settings as default
- Scroll the the bottom and click Save configuration
When you go back to look at your active numbers, you should now see the TwiML Bin associated with your phone number.
Create and configure your LiveKit SIP Inbound Trunk and Dispatch Rule
- Create a
.envfile with the following environment variables:
TWILIO_ACCOUNT_SID="<Your Twilio Account SID>"
TWILIO_AUTH_TOKEN="<Your Twilio Auth Token>"
TWILIO_PHONE_NUMBER="<The phone number you purchased from Twilio, in this format +[country-code][10-digit-number]>"
TWIML_USERNAME="<The username you made up in the TwiML Bin>"
TWIML_PASSWORD="<The password you made up in the TwiML Bin>"
LIVEKIT_URL="<Your LiveKit URL starting with wss://>"
LIVEKIT_SIP_URI="<Your LiveKit SIP URI starting with sip:>"
LIVEKIT_API_KEY="<Your LiveKit API Key>"
LIVEKIT_API_SECRET="<Your LiveKit API Secret>"- Create a
requirements.txtfile with the following libraries:
# livekit
livekit-api

# utilities
dotenv
twilio -
Create an
inbound_trunk.pyfile with the following code:import asyncio import os from livekit import api from dotenv import load_dotenv async def main(): # Load environment variables load_dotenv() # Create an instance of the LiveKitAPI # LiveKit automatically reads the environment variables for the API key and secret livekit_api = api.LiveKitAPI() # Create an Inbound Trunk object that matches the TwiML configuration trunk = api.SIPInboundTrunkInfo( name = "LiveKit to Twilio Trunk", auth_username= os.getenv("TWIML_USERNAME"), auth_password= os.getenv("TWIML_PASSWORD"), krisp_enabled = True, ) # Create a request object with the Inbound Trunk object request = api.CreateSIPInboundTrunkRequest( trunk = trunk ) # Create the Inbound Trunk with LiveKit trunk = await livekit_api.sip.create_sip_inbound_trunk(request) # Close the LiveKit API connection await livekit_api.aclose() # Run the main function asyncio.run(main()) -
Create a
dispatch_rule.pyfile with the following code:import asyncio import os from livekit import api from dotenv import load_dotenv async def main(): # Load environment variables load_dotenv() # Create an instance of the LiveKitAPI # LiveKit automatically reads the environment variables for the API key and secret lkapi = api.LiveKitAPI() # Create a SIP Dispatch Rule object the requests a private/individual room for each call # The room_prefix is 'call-' to indicate that this is part of a telephony system rule = api.SIPDispatchRule( dispatch_rule_individual=api.SIPDispatchRuleIndividual( room_prefix="call-", ) ) # Create a Room Agent object that will be dispatched to the room agent = api.RoomAgentDispatch( agent_name="inbound-agent", ) # Create a Room Configuration object that contains the Room Agent object room_config = api.RoomConfiguration( agents=[agent] ) # Create a SIP Dispatch Rule request with the rule and room configuration request = api.CreateSIPDispatchRuleRequest( rule=rule, room_config=room_config ) # Create the SIP Dispatch Rule with LiveKit dispatch = await lkapi.sip.create_sip_dispatch_rule(request) # Close the LiveKit API connection await lkapi.aclose() # Run the main function asyncio.run(main()) -
In your terminal, create and activate a new Python virtual environment:
user@my-computer sip % python3 -m venv venv user@my-computer sip % source venv/bin/activate (venv) user@my-computer sip % -
Install all of the required libraries:
(venv) user@my-computer sip % pip install -r requirements.txt -
Create the inbound trunk:
(venv) user@my-computer sip % python3 inbound_trunk.py -
Create the dispatch rule:
(venv) user@my-computer sip % python3 dispatch_rule.py
Debugging your LiveKit SIP Inbound trunk and Dispatch Rule
As with any software project, there will definitely be times when something goes wrong and you need to do some debugging. There are two strategies that you could take if you find yourself needing to list or delete an inbound trunk or dispatch rule:
- Using the LiveKit CLI
- Creating simple Python scripts
Since we’ve been working predominately in Python throughout this tutorial, I recommend that you write simple Python scripts, but I provide documentation for both strategies here.
Using the LiveKit CLI
Coming Soon
Creating simple Python scripts
-
list_dispatch_rules.py
import asyncio import os from livekit import api from dotenv import load_dotenv async def main(): # Load environment variables load_dotenv() # Create an instance of the LiveKitAPI # LiveKit automatically reads the environment variables for the API key and secret livekit_api = api.LiveKitAPI() # Request all of the Dispatch Rules from LiveKit rules = await livekit_api.sip.list_sip_dispatch_rule( api.ListSIPDispatchRuleRequest() ) # Print the Dispatch Rules print(f"{rules}") # Close the LiveKit API connection await livekit_api.aclose() # Run the main function asyncio.run(main()) -
delete_dispatch_rule.py
import asyncio import os from livekit import api from dotenv import load_dotenv async def main(): # Load environment variables load_dotenv() # Create an instance of the LiveKitAPI # LiveKit automatically reads the environment variables for the API key and # secret livekit_api = api.LiveKitAPI() # Delete the SIP Dispatch Rule with the specified ID from LiveKit await livekit_api.sip.delete_sip_dispatch_rule( api.DeleteSIPDispatchRuleRequest( sip_dispatch_rule_id="<the ID for the dispatch rule you want to delete>" ) ) # Close the LiveKit API connection await livekit_api.aclose() # Run the main function asyncio.run(main()) -
list_inbound_trunks.py
import asyncio import os from livekit import api from dotenv import load_dotenv from livekit.protocol.sip import ListSIPInboundTrunkRequest, DeleteSIPTrunkRequest async def main(): # Load environment variables load_dotenv() # Create an instance of the LiveKitAPI # LiveKit automatically reads the environment variables for the API key and secret livekit_api = api.LiveKitAPI() # Request all of the Inbound Trunks from LiveKit rules = await livekit_api.sip.list_sip_inbound_trunk( ListSIPInboundTrunkRequest() ) # Print the Inbound Trunks print(f"{rules}") # Close the LiveKit API connection await livekit_api.aclose() # Run the main function asyncio.run(main()) -
delete_inbound_trunk.py
import asyncio
import os

from livekit import api
from dotenv import load_dotenv
from livekit.protocol.sip import ListSIPInboundTrunkRequest, DeleteSIPTrunkRequest

async def main():
  # Load environment variables
  load_dotenv()

  # Create an instance of the LiveKitAPI
  # LiveKit automatically reads the environment variables for the API key and secret
  livekit_api = api.LiveKitAPI()

  # Delete the Inbound Trunk with the specified ID from LiveKit
  await livekit_api.sip.delete_sip_trunk(
    DeleteSIPTrunkRequest(
      sip_trunk_id="<the ID for the inbound trunk you want to delete>"
    )
  )

  # Close the LiveKit API connection
  await livekit_api.aclose()

# Run the main function
asyncio.run(main())
Confirm your Inbound Trunk and Dispatch Rule
Before continuing on, make sure you verify that you created the Inbound Trunk and Dispatch Rule.
(venv) user@my-computer sip % python3 list_inbound_trunks.py
items {
  sip_trunk_id: "<Unique trunk ID>"
  name: "LiveKit to Twilio Trunk"
  auth_username: "<The username you set in your TwiML Bin>"
  auth_password: "<The password you set in your TwiML Bin>"
  krisp_enabled: true
}

(venv) user@my-computer sip % python3 list_dispatch_rules.py
items {
  sip_dispatch_rule_id: "<Unique dispatch rule ID>"
  rule {
    dispatch_rule_individual {
      room_prefix: "call-"
    }
  }
  room_config {
    agents {
      agent_name: "inbound-agent"
    }
  }
}
Deactivate your Python virtual environment
Deactivate your Python virtual environment now that you are done creating the Inbound Trunk and Dispatch Rule:
(venv) user@my-computer sip % deactivate
user@my-computer sip %
Create and configure your LiveKit Agent
- Create a
.envfile with the following environment variables:
LIVEKIT_URL="<Your LiveKit URL starting with wss://>"
LIVEKIT_API_KEY="<Your LiveKit API Key>"
LIVEKIT_API_SECRET="<Your LiveKit API Secret>"
OPENAI_API_KEY="<Your OpenAI API Key>"- Create a
requirements.txtfile with the following libraries:
# livekit
livekit-api

# openai
openai

# utilities
dotenv
twilio - Create an
instructions.txtfile with whatever instructions you want to give your agent. For example:
You are a helpful friend-like assistant to an adult who is living alone. This person will call you to chat about their day, and you will be there to listen and offer advice.

The first thing you will do is ask the person's name and greet them by name. You can use their name when appropriate through the conversation.

You should reference relevant cultural references, movies, tv shows, etc. that the person might be interested in.- Create an
agent.pyfile:
from __future__ import annotations
import os
import logging

from livekit import rtc
from livekit.agents import (
    AutoSubscribe,
    JobContext,
    WorkerOptions,
    cli,
    llm,
)
from livekit.agents.multimodal import MultimodalAgent
from livekit.plugins import openai
from dotenv import load_dotenv

# Load the environment variables
load_dotenv()

# Initialize the logger for the agent
log = logging.getLogger("voice_agent")
log.setLevel(logging.INFO)

# Load the instructions for the AI model
instructions_doc = open("instructions.txt", "r").read()
log.info(f"Instructions: {instructions_doc}")

async def main_entry(ctx: JobContext):
  log.info("Initiating the entry point")
  openai_api_key = os.getenv("OPENAI_API_KEY")
  api_key = os.getenv("LIVEKIT_API_KEY")

  # Connect to the LiveKit room, subscribing only to audio
  await ctx.connect(auto_subscribe=AutoSubscribe.AUDIO_ONLY)

  # Wait for a participant to join the session
  participant = await ctx.wait_for_participant()

  # Set up the OpenAI real-time model
  ai_model = openai.realtime.RealtimeModel(
      instructions=instructions_doc,
      voice="shimmer",
      temperature=0.8,
      modalities=["audio", "text"],
      api_key=openai_api_key,
  )

  # Initialize and start the multimodal agent
  multimodal_assistant = MultimodalAgent(model=ai_model)
  multimodal_assistant.start(ctx.room)

  log.info("AI assistant agent has started")

  # Initialize a session and create a conversation interaction
  session_instance = ai_model.sessions[0]
  session_instance.conversation.item.create(
    llm.ChatMessage(
      role="user",
      content="Please begin the interaction with the user in a manner consistent with your instructions.",
    )
  )
  session_instance.response.create()

# Entry point for the application
if __name__ == "__main__":
    log.info("About to run main")

    # Run the agent, giving it the name "inbound-agent"
cli.run_app(WorkerOptions(entrypoint_fnc=main_entry, agent_name="inbound-agent"))-
In your terminal, create and activate a new Python virtual environment:
user@my-computer agent % python3 -m venv venv user@my-computer agent % source venv/bin/activate (venv) user@my-computer agent % -
Install all of the required libraries:
(venv) user@my-computer agent % pip install -r requirements.txt -
Run the agent:
(venv) user@my-computer agent % python3 agent.py dev 2025-02-26 17:37:11,424 - DEBUG asyncio - Using selector: KqueueSelector 2025-02-26 17:37:11,426 - DEV livekit.agents - Watching /Users/sarahguthals/Documents/GitHub/Tutorials/livekit-twilio-telephone/agent 2025-02-26 17:37:11,872 - DEBUG asyncio - Using selector: KqueueSelector 2025-02-26 17:37:11,877 - INFO livekit.agents - starting worker {"version": "0.12.15", "rtc-version": "0.20.2"} 2025-02-26 17:37:12,129 - INFO livekit.agents - registered worker {"id": "AW_Rub3RdwTsvBD", "region": "US West", "protocol": 15, "node_id": "NC_OPHOENIX1A_vwGCEcUgh5GZ"} -
Call your phone number and communicate with your agent
-
You should see output from your logger in your terminal:
2025-02-26 17:37:11,877 - INFO livekit.agents - starting worker {"version": "0.12.15", "rtc-version": "0.20.2"}
2025-02-26 17:37:12,129 - INFO livekit.agents - registered worker {"id": "AW_Rub3RdwTsvBD", "region": "US West", "protocol": 15, "node_id": "NC_OPHOENIX1A_vwGCEcUgh5GZ"}
2025-02-26 17:37:26,694 - INFO livekit.agents - received job request {"job_id": "AJ_kX2B5WLz3unK", "dispatch_id": "", "room_name": "call-_+18583378486_S2GK5XCDT2Wp", "agent_name": "inbound-agent", "resuming": false}
2025-02-26 17:37:27,230 - INFO livekit.agents - initializing job process {"pid": 88313}
2025-02-26 17:37:27,230 - INFO livekit.agents - job process initialized {"pid": 88313}
2025-02-26 17:37:27,230 - DEBUG asyncio - Using selector: KqueueSelector {"pid": 88313}
2025-02-26 17:37:27,231 - INFO voice_agent - Initiating the entry point {"pid": 88313, "job_id": "AJ_kX2B5WLz3unK"}
2025-02-26 17:37:27,240 - INFO livekit - livekit_ffi::server:134:livekit_ffi::server - initializing ffi server v0.12.11 {"pid": 88313, "job_id": "AJ_kX2B5WLz3unK"}
2025-02-26 17:37:27,243 - INFO livekit - livekit_ffi::cabi:36:livekit_ffi::cabi - initializing ffi server v0.12.11 {"pid": 88313, "job_id": "AJ_kX2B5WLz3unK"}
2025-02-26 17:37:27,257 - INFO livekit - livekit_api::signal_client::signal_stream:96:livekit_api::signal_client::signal_stream - connecting to wss://pareja-2dmlec1i.livekit.cloud/rtc?sdk=python&protocol=15&auto_subscribe=0&adaptive_stream=0&version=0.20.2&access_token=... {"pid": 88313, "job_id": "AJ_kX2B5WLz3unK"}
2025-02-26 17:37:27,501 - DEBUG livekit - rustls::anchors:150:rustls::anchors - add_parsable_certificates processed 153 valid and 0 invalid certs {"pid": 88313, "job_id": "AJ_kX2B5WLz3unK"}
2025-02-26 17:37:27,501 - DEBUG livekit - tokio_tungstenite::tls::encryption::rustls:103:tokio_tungstenite::tls::encryption::rustls - Added 153/153 native root certificates (ignored 0) {"pid": 88313, "job_id": "AJ_kX2B5WLz3unK"}
2025-02-26 17:37:27,501 - DEBUG livekit - rustls::client::hs:73:rustls::client::hs - No cached session for DnsName("pareja-2dmlec1i.livekit.cloud") {"pid": 88313, "job_id": "AJ_kX2B5WLz3unK"}
2025-02-26 17:37:27,501 - DEBUG livekit - rustls::client::hs:132:rustls::client::hs - Not resuming any session {"pid": 88313, "job_id": "AJ_kX2B5WLz3unK"}
2025-02-26 17:37:27,554 - DEBUG livekit - rustls::client::hs:615:rustls::client::hs - Using ciphersuite TLS13_AES_128_GCM_SHA256 {"pid": 88313, "job_id": "AJ_kX2B5WLz3unK"}
2025-02-26 17:37:27,554 - DEBUG livekit - rustls::client::tls13:142:rustls::client::tls13 - Not resuming {"pid": 88313, "job_id": "AJ_kX2B5WLz3unK"}
2025-02-26 17:37:27,554 - DEBUG livekit - rustls::client::tls13:381:rustls::client::tls13 - TLS1.3 encrypted extensions: [] {"pid": 88313, "job_id": "AJ_kX2B5WLz3unK"}
2025-02-26 17:37:27,554 - DEBUG livekit - rustls::client::hs:472:rustls::client::hs - ALPN protocol is None {"pid": 88313, "job_id": "AJ_kX2B5WLz3unK"}
2025-02-26 17:37:28,117 - DEBUG livekit - tungstenite::handshake::client:95:tungstenite::handshake::client - Client handshake done. {"pid": 88313, "job_id": "AJ_kX2B5WLz3unK"}
2025-02-26 17:37:28,460 - DEBUG livekit.agents - http_session(): creating a new httpclient ctx {"pid": 88313, "job_id": "AJ_kX2B5WLz3unK"}
2025-02-26 17:37:28,461 - INFO voice_agent - AI assistant agent has started {"pid": 88313, "job_id": "AJ_kX2B5WLz3unK"}
2025-02-26 17:37:28,464 - DEBUG livekit.plugins.openai.realtime - sync chat context {"to_delete": [], "to_add": [], "pid": 88313, "job_id": "AJ_kX2B5WLz3unK"}
2025-02-26 17:37:28,464 - INFO livekit.agents - Session initialized with chat context {"pid": 88313, "job_id": "AJ_kX2B5WLz3unK"}
2025-02-26 17:37:29,280 - DEBUG livekit.plugins.openai.realtime - conversation item created {"type": "conversation.item.created", "event_id": "event_B5N85vdof0N2Qp32t2Or8", "previous_item_id": null, "item": {"id": "item_359ae0887b5a", "object": "realtime.item", "type": "message", "status": "completed", "role": "user", "content": [{"type": "input_text", "text": "Please begin the interaction with the user in a manner consistent with your instructions."}]}, "pid": 88313, "job_id": "AJ_kX2B5WLz3unK"}
2025-02-26 17:37:29,544 - DEBUG livekit.plugins.openai.realtime - conversation item created {"type": "conversation.item.created", "event_id": "event_B5N85THNoEbAeK0iTWJxt", "previous_item_id": "item_359ae0887b5a", "item": {"id": "item_B5N85MRnchyVkuoNbxIs1", "object": "realtime.item", "type": "message", "status": "in_progress", "role": "assistant", "content": []}, "pid": 88313, "job_id": "AJ_kX2B5WLz3unK"}
2025-02-26 17:37:32,871 - DEBUG livekit.agents - committed agent speech {"agent_transcript": "Hi there! What's your name? I'm here to chat with you and brighten your day.", "interrupted": false, "pid": 88313, "job_id": "AJ_kX2B5WLz3unK"}
2025-02-26 17:38:01,730 - DEBUG livekit - tungstenite::protocol:666:tungstenite::protocol - Received close frame: Some(CloseFrame { code: Normal, reason: "" }) {"pid": 88313, "job_id": "AJ_kX2B5WLz3unK"}
2025-02-26 17:38:01,730 - DEBUG livekit - tungstenite::protocol:683:tungstenite::protocol - Replying to close with Frame { header: FrameHeader { is_final: true, rsv1: false, rsv2: false, rsv3: false, opcode: Control(Close), mask: None }, payload: [3, 232] } {"pid": 88313, "job_id": "AJ_kX2B5WLz3unK"}
2025-02-26 17:38:01,731 - WARNING livekit - livekit::rtc_engine:446:livekit::rtc_engine - received session close: "signal client closed: \"stream closed\"" UnknownReason Resume {"pid": 88313, "job_id": "AJ_kX2B5WLz3unK"}
2025-02-26 17:38:01,734 - DEBUG livekit.agents - shutting down job task {"reason": "", "user_initiated": false, "pid": 88313, "job_id": "AJ_kX2B5WLz3unK"}
2025-02-26 17:38:01,735 - INFO livekit.agents - process exiting {"reason": "", "pid": 88313, "job_id": "AJ_kX2B5WLz3unK"}
2025-02-26 17:38:01,736 - DEBUG livekit.agents - http_session(): closing the httpclient ctx {"pid": 88313, "job_id": "AJ_kX2B5WLz3unK"}
-
-
Shut down your agent with control-c
-
Deactivate the Python virtual environment when you are done testing the agent locally:
(venv) user@my-computer agent % deactivate
user@my-computer agent %
Deploy your LiveKit Agent
For this project, the only thing that needs to be deployed and always available is the LiveKit Agent. The Inbound Trunk and Dispatch Rule are already associated with your LiveKit project. There are many ways you can choose to deploy your application, but I find that one of the easiest is using Render and having it pull from a specific branch on a GitHub repository.
Publish your code to GitHub
To publish your code on GitHub, follow these simple steps:
-
Go to GitHub.com and create a new repository
- Name: Give the repository a name
- Description: I personally think it’s a good idea to give a short description of the project
- Visibility: For this project, you can definitely have it be public, because we will not publish any of our API keys, but it also does not have to be public
- Initialize this repository with:
- README: I don’t like to do this when I’m starting from code on my local. machine, I prefer to create a README on my local machine and just upload it to GitHub with the initial push.
- .gitignore: Similarly, we will need to be adding this before we push to GitHub, so I do not add a templated .gitignore
- License: It’s always a create idea to choose a license. If you’re unsure what license to choose, check out https://choosealicense.com/
- Click Create repository
-
The repository home page will have commands you can run, but before we do that, let’s make sure we have our README and .gitignore files
-
Create a README.md file:
# LiveKit Agent for Telephony with Twilio This is a simple LiveKit agent that will answer calls places with numbers purchased through Twilio. This agent is part of a larger tutorial that can be found [Coming Soon](). -
Create a .gitignore file:
.env -
In your terminal, run:
git init git add . git commit -m "Publishing my LiveKit Agent to my GitHub repository git branch -M main git remote add origin <Your GitHub repository URL, e.g. https://github.com/drguthals/livekit-telephony-agent.git> git push origin main -
On your GitHub.com repository home page, refresh and you should see the following files:
.gitignoreREADME.mdagent.pyinstructions.txtrequirements.txt
Deploy your agent on Render
Now that your code is hosted on GitHub, you can host the actual running LiveKit Agent on Render. Just follow these steps:
- Create project on Render
- Name your project
- Choose a name for the initial environment, I left it as a default “production”
- Create web service
- Source Code: I recommend connecting to a specific branch on a repository. Doing it this way will make sure that every time you push to that branch on your git provider your hosted application will be updated.
- Name: Name your web service
- Project: This should already be pointing to the project you just created
- Language: Python
- Branch: For the production environment, I like to have the
mainbranch be the branch that is deployed- Then I will often protect that branch in GitHub
- Region: This should autofill to the region that Render offers closest to you
- Root Directory: If you decided to keep the agent as a separate repository, as this tutorial did, you can skip this and leave it blank
- Build Command:
pip install -r requirements.txt - Start Command:
python3 agent.py start - Choose your instance type depending on what you want to do with this application.
- In the Environment Variables section, click Add from .env and then copy your .env contents into the popup modal.
- As a reminder, they should be:
- Click Deploy Web Service
- Confirm Render was able to install the libraries and run the agent successfully.
Now, every time you push new code to your main branch on your GitHub repository, Render will re-install any Python libraries in requirements.txt and then re-run your agent.py code.
Testing your telephony agent application
It’s finally time. It’s time to test to make sure your application is working by calling your phone number
- You will notice that you get a Twilio trial message at the beginning of the call.
- This does not affect the ability of your LiveKit agent to run, so for testing purposes, you can just push ‘1’ to dismiss the message and connect you to the agent.
- To get rid of this, upgrade your Twilio account to a paid account.
Next project ideas
I don’t know about you, but making this simple telephony agent gave me so many ideas. As I continue building, you will find tutorials linked down below.